Deciding on a Prototype
When I first received the MakeyMakey Kit I began to think of how I could use that in the classroom. My thought immediately turned to classroom trivia. I have had my students play a Jeopardy style game for the past four year in order to help them study for tests. For this, I have used the Classroom Jeopardy Set offered by Educational Insights. At my previous school and my internship, it was readily available for use. At the current school, I had to buy one. Unfortunately, a new set costs upwards of $600 dollars! I did the sensible thing and bought an older version for around $50 instead.
This version has had several problems. Mainly, it is notoriously not user friendly. Typing up questions is quite a chore. It can take several hours. As a teacher working four jobs and going to grad school I don’t necessarily have the time to devote to that. I have used it on some occasions.
On some occasions I have opted instead just to use a more traditional and time friendly PowerPoint based Jeopardy game. This too has problems. Mainly, it is hard to tell which students raised their hands first. Students will of course argue about this too and slow down the process. If I could make my own buzzer, I could solve this problem. For this prototype, I have chosen to create a simple buzzer system. The buzzers will consist of two found items making unique and noticeable sounds. These will be used by competing teams in my classroom for a game of classroom Jeopardy.
Using Found Items
I am a frequent visitor to thrift shops, antique stores, and garage sales. I also spend far, far too much time on Ebay. I collect historical and cultural items from across history. From this collection of memorabilia is where I chose to find materials to use in my buzzer project. You can view the picture below to see some of the items I have gathered over the years.
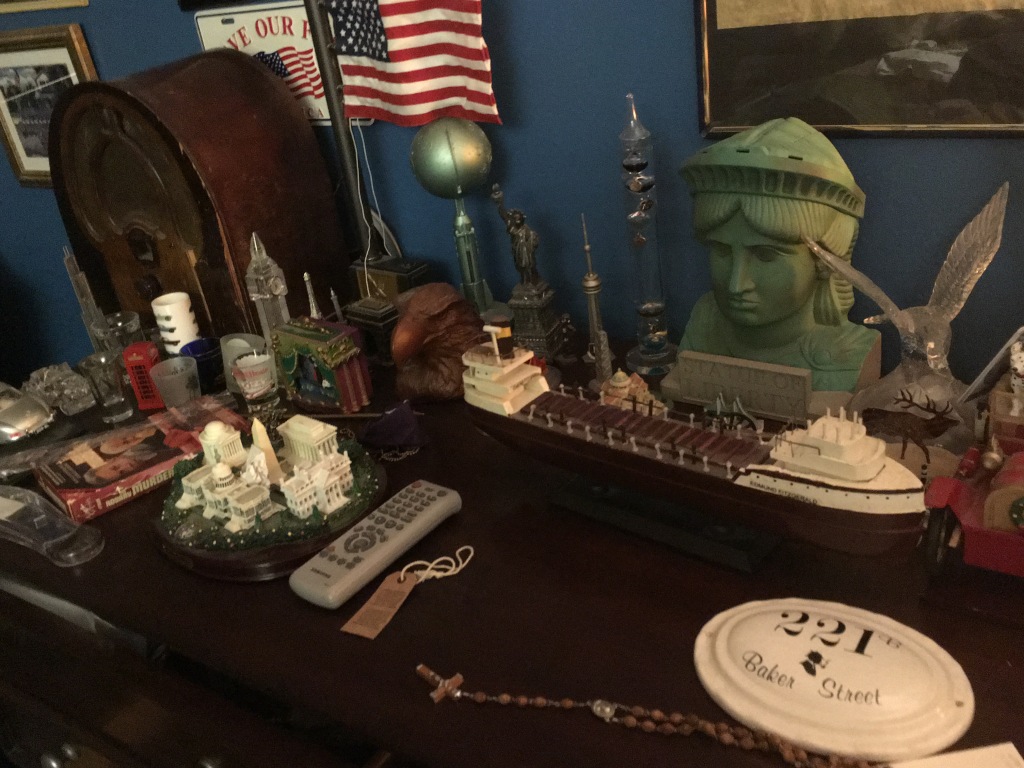
That’s just one small area of the memorabilia I’ve collected over the years. There is a lot more, but I’m afraid I don’t want to show those due to how messy it is!
From my collection of thrift items, I grabbed the following to use.


Adapting My Items for Usage
Of these items, few of them worked. Big Boy and Lady Liberty allowed no electricity to flow whatsoever. The campaign buttons would not work by pressing on the front. The watch similarly did not work well. The coins are the only items that worked right away.
While the coins were functional, I did not want to necessarily use them. I very much wanted to use the buttons. I came up with a solution: Wrap the backs of the buttons in aluminum foil. This allowed the electricity to flow while maintaining the unique image of each button. Take a closer look and you can see how I did that with these two buttons.

The other thing I decided to adapt for usage was the earth link cable. In order for MakeyMakey to work, you need to be holding on to an alligator clip that is hooked in to the Earth portion of the controller. I found this uncomfortable and chose to adapt the watch into an Earth band. I wrapped it in aluminum foil and wore it under my wrist like so.

This allowed me to be in contact with the earth wire comfortably. As a bonus, it is also easy to put on and remove from and student using the MakeyMakey. One very important thing that I noticed is that this will not work unless the aluminum foil is in contact with your vein. That is why the watch is worn underneath my wrist instead of above like normal.
For a more detailed look at how I experimented with MakeyMakey, please visit my public Evernote Workbook.
Finding the Buzzer Noises
This is where my prototype needs the most work. Right now I have found a very simple solution using the MakeyMakey test site. The test site allows you to play two different notes on a set of bongo drums. The bongo drums each play very distinct notes and light up the screen in different locations. Using this site, I am able to create an easy simple buzzer for a two person game of trivia. The site can be found here.
How to Build it
Materials Needed:
- A MakeyMakey Kit
- One Wristband
- Aluminum Foil
- Two Campaign Buttons or Two Coins to use as Buzzers
- A Computer with an internet connection
- PowerPoint
Instructions for setting up the MakeyMakey:
- Gather all the needed materials.

- Open the MakeyMakey Kit. Find the orange cord and the MakeyMakey Control Board.

- Plug the orange cord into the back of the Control Board. Plug the other end into your computer.


- Take your wristband and wrap in Aluminum foil. I used an old watch for this part.


- Take an alligator clip and attach one end to the Aluminum Foil. Attach the other to the slot labeled Earth on your Control Board.


Instructions for Using Coins as the Buzzers
- Attach an alligator clip to the coin you wish to use. Attach the other end to the Control Board in the area labeled space.


- Attach a second alligator clip to the second coin. Attach the other end to the arrow point left on the Control Board

Instructions for Using Campaign Buttons as the Buzzers
- Take the precaution of corking old pins. Modern pins have safety backs. Older pins do not. I have found that using an eraser from a broken mechanical pencil worked well for this.

- Cover the back of your campaign pins with aluminum foil. The pins themselves do not allow electricity to flow. Make sure that the foil slightly overlaps the front of the pin.


- Attach one end of an alligator clip to the aluminum foil. Attach the other end to the area labeled as space on the Control Board.

- Attach one end of an alligator clip to the aluminum foil on the remaining button.Attach the other end to left arrow on the Control Board.


Instructions for Use
- Place the wristband on your wrist. Make sure that the aluminum foil is located under your wrist. It will not work if it is located above your wrist.

- Go to http://makeymakey.com/bongos

- Use your buttons or coins to make the bongos play. Be aware that the player must touch the foil if you are using campaign buttons.

You will notice that each buzzer makes a noticeable and distinct sound. It will also light up the screen in different locations.Left Buzzer

Space Buzzer

As you can see, it is very easy to tell which buzzer is which.
- Divide your class into two groups and assign people to control the buzzer.
- Begin to ask trivia questions. Each team will be able to buzz in. You will know who buzzed first by the sound and the lighting pattern on the screen.
Lastly, I’ve included video instructions as well as a small clip of this device in action below. Please check it out.
How the Prototype Can Be Used Currently
Right now, the prototype is pretty simple. My purpose with this prototype is to use it in a game of classroom Jeopardy using the templates found at this site. This can also be used in other ways.
As you saw in the picture above, I had campaign buttons from George W. Bush and Richard Nixon. Campaign buttons are very cheap and easy to get a hold of. With the election year coming up, you could use campaign buttons from the current election. You could create a simple PowerPoint with the election issues and have students click the candidate who stands for this issues. It will teach students the differences between the political parties and the candidates themselves.
This compare and contrast option can be used with virtually anything. Below you will see a picture of a British Pound and a Mexican 10 Peso piece. You could use these as buzzers and ask students questions comparing the countries. The students can then click on the right coin for each country to give their answer.

The Future of This Prototype
I have begun the process of transforming everyday objects into educational objects. As with all transformations, there is a lot more work to do before I am satisfied with it.Right now, I have given you the ability to make a simple buzzer to use with a PowerPoint game. As I experiment more with this content, I intend to create my own trivia game that incorporates multiple homemade buzzers into it. That is the future of this prototype. If you have any suggestions on sites or software to do this with, please do not hesitate to let me know.
On a Separate Note
People learn in different ways. Some people learn best with visual examples. Including visual images and videos allows people to see how creations are put together, not just read it. By including written directions, I am also addressing the instructions to the people who learn by reading. Combining these two forms together allows this blog post to reach a wider audience.

