Topic for the Lesson: The North v. the South
Grade Level/Course: 8th Grade American History
Unit: The Road to the Civil War
Michigan Education Standards:
- 8-U4.2.2 – The Institution of Slavery– Explain the ideology of the institution of slavery, its policies, and consequences.
- 8 – U4.2.1 – Comparing Northeast and the South – Compare and contrast the social and economic systems of the Northeast and the South with respect to geography and climate and the development of Race Relations
Standards
Goals/Objectives for this Lesson:
- To Understand how the country divided itself when it came to the issue of slavery.
- To Understand how the issue of slavery led to the Civil War
Assessment Tools: A quiz will be given at the end of the lesson to determine how much information they retained.
Structure:
| Pre-Lesson: Life in the North and South | Students will be asked to read Ch. 14 in the text book for homework. This chapter covers the differences between North and South in the lead up to the Civil War. | Time: 24 hours |
| Initiation/Opening : Teacher’s Activities
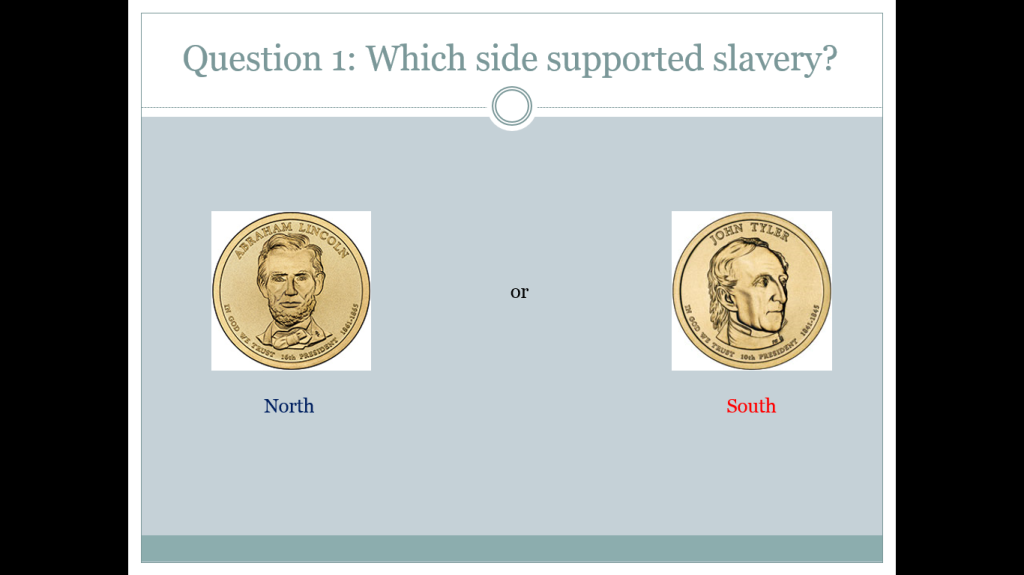
In front of the SMART Board/Projector will be the Makey-Makey Kit, covered up and out of sight. The teacher will use their SMART Board/projector to display two images side by side. A portrait of Abraham Lincoln and a portrait of John Tyler. The teacher will ask the students to identify who these two men are. The teacher will guide the students into realizing that Abraham Lincoln is an embodiment of the North and John Tyler is an embodiment of the South. |
Student Activities: Students will identify the two historical figures and discuss what they know about them with the teacher. They will be guided to understanding who each president was more representative of: The North or the South | Time: 20 minutes |
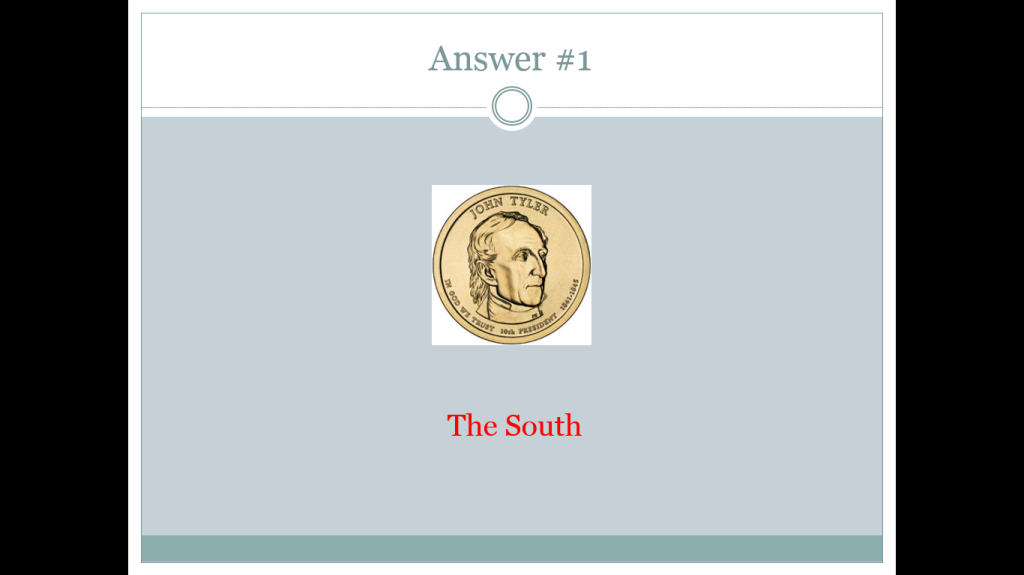
| Teacher’s Activities: As the students wind down their conversation, the teacher will unveil the Makey-Makey Kit. Attached to the kit will be two presidential coins. Attached to the left arrow will be an Abraham Lincoln coin. Attached to the space bar will be a John Tyler coin. The kit will be attached to a laptop with the website http://makeymakey.com/bongos opened up. Each touch of the coin will make a distinct, unique sound. The teacher will demonstrate which president makes which sound. On the screen there will be a PowerPoint display asking a series of questions with only two answers: North or South. The teacher will ask for a volunteer to come over to the MakeyMakey Kit. The volunteer will wear the Earthband. The teacher will switch out volunteers every few questions. As they answer the questions, the teacher will move forward in the slide show to compare the classes answers to the actual answers. The teacher will lead discussions on why the correct answer is the correct answer. | The student volunteer will poll the rest of the class to decide how to answer each question. The volunteer will answer accordingly. Several volunteers will be utilized in this process. Students will discuss right and wrong answers with the teacher. | Time: 50 Minutes |
| Closure: The teacher will lead discussions on the answer the students chose. The students will be given a quiz with similar, but not identical questions. The quiz will serve as an exit card The teacher will compare their quiz answers with the answers they gave in class. | Students will take a quiz as an exit card for class. | Time: 20 minutes |
Materials needed:
- 1 Smart Board or Projector
- 1 Makey-Makey Kit
- 2 Presidential $1 coins; one of Abraham Lincoln and one of John Tyle
- Two computes
- One PowerPoint slideshow
- 25 Quizes
- 1 Wrist Band
- Aluminum Foil
Instructions to be utilized:
- Cooperative Learning
- Discussion
Rationale for this Lesson Plan:
The purpose of this lesson is to give students a way to physically interact with history and understand symbolism through the use of Presidents Lincoln and Tyler as symbols of the North and South. It is very easy to teach a history lesson using just a PowerPoint. As Culatta points out, this is simply digitizing the old methods of teaching. I seek rather to transform this method into an interactive game.
The students that will experience this lesson are ESL students. Very few of my students have a mastery of the English language. It is hard for them look at words in a textbook or on the board and see meaning. By giving them a visual object in the form of a coin I hope to increase their awareness of history. This idea is based on the Cognitive Theory of Multimedia Learning (CTML) proposed by Richard Mayer. CTML states that words and pictures enter the brain in separate chunks. These chunks then integrate with prior knowledge in the long-term memory to create an idea that learners can remember and recall. This theory was tested on ESL students in Taiwan by Kuo, Yu, and Hsiao. Their research indicates that multi-modal lessons improves the average test scores of their ESL students.
By using these methods I hope to make history come alive for my students. This lesson will serve as a tester for my concept. The coins I am using as buzzers are easy to swap out for other historical objects. I have tested this method out with a few diverse students at lunch time. They have greatly enjoyed it so far. I plan on using this with my class next week and gain a full understanding of the success of this.
References
Kuo, Fang-O, Pao-Ta Yu and Wei-Hung Hsiao. (2013). Develop andEvaluate the Effects of Multimodal Presentation System on Elementary ESL Students. Turkey. Turkish Online Journal of Educational Technology, Volume 12, Number 4.
Mayer, R. E. (2001). Multimedia Learning. New York: Cambridge University Press.
Directions for Creating the Coin Buzzers
- Purchase a MakeyMakey

- Find a wristband, some aluminum foil and the coins you want to use. For my wristband, I used an old watch.

- Wrap the watch in the Aluminum Foil

By doing this, you have successfully created an Earthband. - Connect the MakeyMakey to a laptop by plugging one end of the red USB cable into the MakeyMakey Kit. Plug the other end into a laptop.


- Attach one end of an alligator clip to the left arrow key on your Makey Makey. Attach the other end to your first coin. Attach a second alligator clip alligator clip to the space button on your MakeyMakey. Attach the other end to your second coin.


- Place the Earthband around your wrist with the aluminum foil touching your veins on the underside of your wrist.Connect an alligator clip to the aluminum foil on your Earth band. Connect the other end of the alligator clip to the part of your MakeyMakey labeled Earth.


- Using the computer hooked up to your MakeyMakey, please go to http://makeymakey.com/bongos .
- Each coin will now make a distinctive sound when pressed. These will serve as buzzers. You are ready to go with the buzzer set.
Directions for Making the Quiz
A Note Before Continuing
Just like all things in education, there is no one way to make this quiz. I have chosen to use Powerpoint as it is a simple system. You may choose to do this differently. Some programs you could use are Prezi, SMART Notebook, or even word itself. These directions will be for Powerpoint.
- Find the questions for your quiz. Each question will be multiple choice. The only options will be North or South. Listed below are some example questions you may ask in this quiz.
– Which area of the country supported slavery?
– Which area of the country was more industrialized?
– Which area of the country relied on cotton?
– Which area of the country had more people living in cities than on farms?
– Where was the Democrat party stronger? - Make a PowerPoint. This is a two part step. First, type the question you want ask in one slide. Make sure to include the answer choices.
On the next slide, provide the answer.
Congratulations, you have successfully prepared for this lesson. Goodnight, and Good Luck.
